
So you’re looking to light up your workshop, and you’ve heard a lot about high lumen LED shop lights. The short answer is yes, they’re generally a great upgrade for most workshops. They offer brighter, more efficient, and often longer-lasting illumination compared to traditional fluorescent or incandescent options. But it’s not simply a matter of grabbing the first “high lumen” light you see off the shelf. There’s a bit more to understand to make sure you get the right fit for your specific needs. This article will walk you through the practical aspects of choosing and implementing these lights.
Let’s break down why these lights Martliving are gaining so much traction and why they often make a lot of sense for a workshop environment.
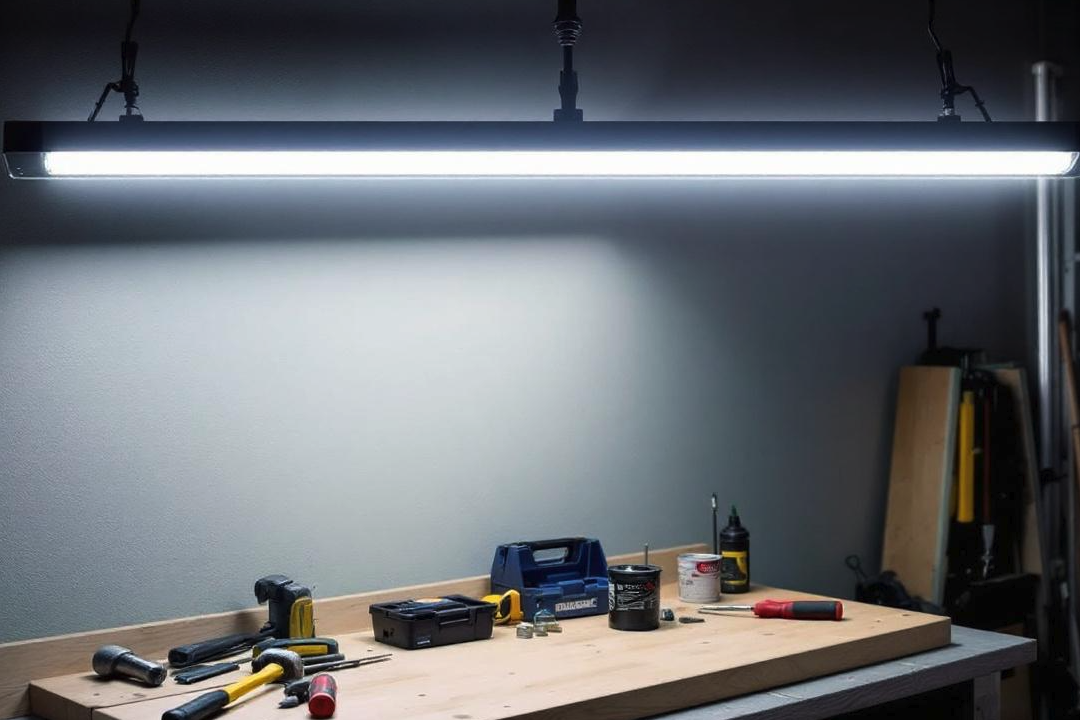
Better Visibility
In a workshop, you’re often dealing with small parts, critical measurements, or intricate details. Good lighting isn’t a luxury; it’s a necessity for accuracy and safety. High lumen LEDs provide a significant boost in brightness, cutting through shadows and reducing eye strain. This clearer vision can directly impact the quality of your work and your ability to spot potential errors before they become bigger problems.
Energy Efficiency
One of the biggest draws of LED technology is its energy efficiency. Compared to old fluorescent tubes, LEDs consume considerably less power to produce the same amount of light, or even more. Over time, this translates into lower electricity bills, which can add up, especially if your shop lights are on for extended periods. It’s a practical saving that makes the initial investment more palatable.
Durability and Lifespan
Workshops can be tough on equipment. Dust, vibrations, and occasional bumps are all part of the game. LEDs, being solid-state devices, are generally more robust than glass fluorescent tubes. They’re less prone to breakage and often have much longer lifespans. This means less time spent replacing bulbs and more time focusing on your projects. A typical LED shop light can last tens of thousands of hours, a significant improvement over traditional options.
Instant On and Flicker-Free
Ever dealt with fluorescent lights that flicker or hum for a few seconds before fully lighting up? It’s annoying and can be distracting. LEDs offer instant-on illumination at full brightness, with no warm-up period. They also don’t suffer from the flickering issues sometimes associated with older lighting technologies, which can be irritating and even contribute to eye fatigue.
Understanding Key Specifications
When you’re looking at different high lumen LED shop lights, you’ll encounter a few terms and numbers. Knowing what these mean will help you make a more informed decision.
Lumens
This is probably the most important specification for shop lights. Lumens measure the total amount of visible light emitted by a source. For a workshop, you generally want a high lumen output. What’s “high enough” depends on the size of your shop and the type of work you do. A hobbyist might be fine with 4,000-6,000 lumens per fixture, while a professional workshop might aim for 8,000-10,000 lumens or even more, per fixture, and certainly more fixtures overall. There isn’t a magic number, but more lumens generally mean more light.
Kelvin (Color Temperature)
Color temperature, measured in Kelvin (K), describes the “color” of the light.
- Warm White (2700K-3000K): This is a yellowish light, similar to incandescent bulbs. It’s generally not ideal for workshops as it can make it harder to distinguish colors accurately.
- Neutral White (3500K-4000K): A good balance, offering a clean, natural light without being too harsh. Some people prefer this for general shop use.
- Cool White/Daylight (5000K-6500K): This is often the preferred range for workshops. It’s a bright, bluish-white light that closely mimics natural daylight. It provides excellent clarity for detail work and color accuracy. Avoid anything much higher than 6500K as it can start to look sterile and cause eye strain for some.
CRI (Color Rendering Index)
CRI measures how accurately a light source renders colors compared to natural daylight. A higher CRI (on a scale of 0-100) means colors will appear more true-to-life. For tasks requiring precise color matching (painting, woodworking finishes, etc.), aim for a CRI of 80 or higher. For general shop use, anything above 70-75 is usually acceptable, but higher is always better if your budget allows.
Wattage
Wattage indicates how much power the light consumes. While important for energy consumption, it shouldn’t be your primary metric for brightness. Focus on lumens first, then look at wattage to compare efficiency (more lumens per watt is better). Don’t fall into the trap of thinking higher wattage automatically means brighter light; modern LEDs are very efficient, and lower wattage can still produce significant lumens.
Types of High Lumen LED Shop Lights
There’s a good variety of form factors available, each with its own advantages.
Integrated LED Fixtures
These are shop lights where the LED emitters are permanently built into the fixture.
- Pros: Often very sleek, compact, and designed for optimal heat dissipation. No need to worry about compatibility with separate bulbs.
- Cons: If a component fails, you usually replace the entire fixture, not just a bulb.
LED Tubes (T8, T5 Replacements)
These are LED equivalents designed to fit into existing fluorescent tube fixtures.
- Pros: A good option for upgrading existing setups without replacing entire fixtures. Often more affordable per light.
- Cons: You need to check compatibility with your existing ballast (some LED tubes are “ballast-compatible,” others require a “ballast bypass” or direct-wire setup). Not all old ballasts are compatible, and bypassing can be more involved.
Linkable Shop Lights
Many modern LED shop lights are designed to be “linkable,” meaning you can connect multiple fixtures end-to-end with a single power source.
- Pros: Simplifies wiring and reduces the number of outlets needed. Great for covering long areas or creating continuous bright zones.
- Cons: Check the maximum number of fixtures that can be safely linked on a single circuit or power cord.
High Bay vs. Low Bay
While “high lumen” generally implies sufficient brightness, these terms refer to the intended mounting height.
- High Bay Lights: Designed for very high ceilings (typically 20 feet or more). They project light downwards over a large area with a more concentrated beam.
- Low Bay Lights: Suitable for standard workshop ceiling heights (8-16 feet). They often have a wider beam spread to cover the work area effectively. Most typical homeowner or small commercial workshops will use low bay style lights.
Planning Your Workshop Lighting Layout
Simply hanging a few lights randomly won’t give you the best results. A little planning goes a long way.
Determine Light Levels Needed
Consider the tasks you’ll be performing.
- General Illumination: You need a base level of brightness throughout the shop to move around safely and perform basic tasks.
- Task Lighting: For specific workbenches, machinery, or detail work, you’ll want extra concentrated light. These might be additional fixtures hung directly over the area or even portable task lights.
Spacing and Placement
Avoid hanging lights too far apart, which can create shadows and dark spots. A common recommendation is to space fixtures approximately 4-6 feet apart, running them parallel to your primary work areas. If your shop is long, running two or more rows might be necessary.
Avoid Glare
Direct glare from an unprotected bulb can be uncomfortable and impair visibility. Look for fixtures with diffusers or lenses that help spread the light evenly and reduce harsh spots. Positioning lights where they won’t shine directly into your eyes when you’re working at a bench is also important.
Account for Obstructions
Shelves, large machinery, or storage units can block light. Plan your fixture placement to illuminate these areas adequately or to avoid placing lights directly behind tall objects that would cast large shadows.
Installation Considerations
Once you’ve chosen your lights, getting them safely and effectively installed is the next step.
Powering Your Lights
Most high lumen LED shop lights are designed to plug into a standard 120V outlet.
- Existing Outlets: Check if you have enough accessible outlets, especially if you plan to link multiple fixtures.
- Dedicated Circuits: For larger workshops or many lights, consider consulting an electrician to ensure your electrical panel can handle the load and to potentially install dedicated circuits. This prevents overloading and nuisance tripping of breakers.
Mounting Options
Most shop lights come with chains or cables for hanging.
- Ceiling Joists: The most common and secure method is to screw hooks directly into ceiling joists. This provides a strong anchor point.
- Drywall Anchors: If joists aren’t conveniently located, heavy-duty drywall anchors can be used, but always check their weight rating against the weight of your fixture.
- Adjustable Height: Hanging fixtures with chains allows you to adjust the height, which can be useful for directing light more effectively at different work surfaces.
Wiring and Linkage
- Plug-and-Play: Many modern LED shop lights are designed for easy plug-and-play installation.
- Linking: If you’re linking fixtures, make sure you don’t exceed the manufacturer’s recommended maximum number of units on a single run to prevent overloading the integrated power supply.
- Professional Help: If you’re uncomfortable with electrical work, especially if it involves modifying wiring or installing new circuits, it’s always best to call a qualified electrician. Safety should be your top priority.
Maintenance and Longevity
One of the benefits of high lumen LED shop lights is their relatively low maintenance, but a few practices can help extend their life even further.
Keep Them Clean
Dust and debris can accumulate on light diffusers, reducing light output. Periodically wipe them down with a damp cloth (ensure the power is off!) to maintain optimal brightness.
Check Connections
Occasionally inspect power cords and linked connections for any signs of wear, fraying, or loose connections. Address these promptly to prevent electrical issues.
Avoid Extreme Conditions
While LEDs are durable, extreme heat or very high humidity can shorten their lifespan. Ensure your workshop environment is within the recommended operating temperature range specified by the manufacturer. If your workshop experiences significant temperature swings, look for lights rated for such conditions.
Budgeting for Your Upgrade
High lumen LED shop lights generally represent a higher initial investment compared to older fluorescent fixtures. However, this upfront cost is often offset by several factors.
Cost vs. Value
Don’t just look at the price tag. Factor in the long-term energy savings, the reduced need for bulb replacements, and the improved working conditions. A slightly more expensive, higher quality LED light with a good warranty can often be a better value in the long run than a cheaper, less efficient option.
Rebates and Incentives
Check with your local utility company or government agencies. Sometimes, there are rebates or incentives available for upgrading to energy-efficient lighting, which can help reduce your net cost.
Phased Upgrades
If replacing all your workshop lights at once is too much of a financial stretch, consider a phased approach. Start by replacing the lights over your primary work areas, then gradually upgrade the rest of the shop as your budget allows.
By carefully considering these aspects, you can successfully upgrade your workshop lighting with high lumen LEDs, creating a brighter, more efficient, and safer workspace for all your projects. It’s a practical enhancement that pays off in both comfort and productivity.